Showing posts with label tutorials. Show all posts

Monday, March 28, 2011

Smartgun Tutorial by Catsy


Brandon Bannerman (Catsy) is both a customizer and fan of the Alien's movies. Thus, it's no surprise that he's put together a tutorial on how to create your own minifig smartgun using BrickArms and LEGO parts.

Pricey? It can be if you don't have the requisite BA parts, but what can you do until Hazel releases his version via United Armory?

You can see the full tutorial on Brandon's Flickr stream.

Sunday, February 13, 2011

Another Fantastic Tutorial from Brick Blogger


Akunthita is quickly building quite the collection of fun and useful customization tutorials. The latest is how to repurpose the figure heads from the defunct LEGO 4 Juniors line in your custom creations.

You can see the full tutorial on The Brick Blogger.

UPDATE: Starwars4J added a link to the BrickForge forums where Armothe describes another way to reuse the LEGO 4 Juniors pieces, and how to get more mileage out of the Toy Story cowboy hats.

Friday, February 4, 2011

Photo Tutorial - Producing Ghost/Hologram Effects

As we approach the weekend, it's another opportunity for folks to work on their entries for this month's Minifigure Design Battle brief - The Paranormal Gunslinger. An effect you may want to try in your presentation is to make the gunslinger or his adversaries appear to be more ghostlike (ghosts one of the many creatures that fall under the banner of 'paranormal activity').


I managed to find a nice tutorial from site JC Icons which walks you through a process for making hologram projections in GIMP - a free, open-source image editing software with functions similar to Photoshop. The functions are so similar, that I'm guessing the Photoshop experts could follow along as well. The final result gives you a blue, transparent 'hologram' effect like you would see with the AI in Halo or the projections in Star Wars. A color change and/or a wipe effect where the image phases in would produce a nice phantasm for your final entry into the contest. 

Speaking of which, entries must be submitted to the UD Minifigure Design Battle Arena group on Flickr before 12:01 am EST February 16th, 2011 (in other words, at the end of that Tuesday). Entries submitted after this time will not be considered eligible. Remember to read the ‘Rules and Guidelines’ thread before submitting your entry.

This month’s winning prize is once again sponsored by FireStar Toys, where the victor will receive a gift card to FireStar worth £25 (approximately $40 USD*) which can be used on a wide variety of LEGO brand products, custom minifigures, or custom accessories from companies like BrickArms, BrickForge, Tiny Tactical, Si-Dan Toys, or Amazing Armory Ltd., just to name a few.

Questions about this contest or the rules should be submitted to Cygnet at uglyduck.bricklink@gmail.com . Good luck!

(Thanks to JC Icons for the great how to!)

*Exact value in US Dollars is dependent on the currency exchange rates at that time.

Sunday, January 30, 2011

Quick Hits: Lower Prices, New Minfig Galleries, and Safer Mods

A quick round up of events before calling it another day...

Toys N Bricks is reporting that the prices of LEGO key chains and magnet sets are being lowered in Canada. Key chains are dropping $0.50 to $5.49 CAN, and magnet sets are shedding $4.50 to $15.49. This appears to put these more in line with current US MSRP. You can see the full story at Toys N Bricks.

Huw has placed yet another minfig gallery up at Brickset. Several galleries have already been uploaded, the most recent being the Spider Man figs. When you get a chance, check the all out. A great alternative to BrickLink or Brickpedia when looking for minifig reference photos.

Finally Akunthita has put up a nice tutorial on how to more safely mod a Castle/Kingdoms crown at The Brick Blogger. There are several tips that are handy for any type of similar modification of LEGO or custom parts. Do take a look when you get a chance. Also, take the time to read our customization tutorial disclaimer before performing any alterations.

That's all for now. Good night to all in Minifig Nation...

Cygnet
Minister of Information
Ugly Duck Command Center
Minifig Nation

Friday, January 28, 2011

Catsy's Stargate Tactical Vest and Tutorial


Brandon (Catsy) continues to impress, this time due to his inventiveness with a craft knife. Pictured above is Brandon's custom minifigure of 'Samantha Carter' from Stargate SG-1. Samantha is sporting an Omega tactical vest that Brandon created using ribbon and black foam. I think it has a nice feel and adds an extra dimension (literally) to custom cloth accessories.

But wait, there's more...continuing to show his commitment to 'giving back' to the customs community, he's posted a brief tutorial on how to make one for yourself. So why not head on over to Brandon's Flickr stream and check it out. Just hit up your local craft store before you do.

Wednesday, January 26, 2011

Tutorial: Minifig Keychain Removal


Akunthita's going to get a reputation...and a good one at that! Hot on the heels of the recent glued minifig removal tutorial, Akunthita now has a comprehensive how-to on rescuing figs from key chains.

True to the previous effort, several techniques are described, plus there's a video demonstrating a method using a soldering iron.

As always, please read through our customization tutorial disclaimer before performing any of the customization methods described on our site. 

You can find the full tutorial on Akunthita's blog The Brick Blogger.

Monday, January 10, 2011

Video Tutorial - Lightsaber Effects in GIMP


Over the weekend I registered for the Clone Army Builder's Guild forum as I've heard nothing but good things about the group. I was looking through the forum topics and found a link to the video tutorial above on how to make 'lightsaber effects' in GIMP, a free, open-source photo editing software that has similar functionality as Photoshop.

A quick use of the YouTube search and it appears that this video is the most viewed tutorial on the site for this topic (it doesn't mean it's the best, of course, but that's a story for another time). Nine minutes later and a little practice and you could be adding glowing lightsabers, eyes, or power cores to your minifig creations or vignettes.

The one place where this tutorial is wanting is in how to generate believable light effects from said blade. Although the end result looks quite good, it doesn't cast the light and shadows you would expect. If anyone knows a fix for this, please let us know.

Thanks to the folks at the CABG for pointing this out!

Monday, January 3, 2011

Minifig Customization 101: The Best of Sculpting

Did you know that back issues of BrickJournal are available as free digital downloads? Did you know BrickJournal has a recurring column called 'Minifig Customization 101'?

It appears that BrickJournal 10 is now available as a free pdf download, and guess what? It has a sculpting tutorial as part of the Minifig Customization 101 series! In the past these have been available as links on our tutorial page, but I'll have to see if I can track these down. In the meantime, you can download the entire free issue here.


In a quick scan of the TwoMorrows Publishing site unearthed another gem...Jared Burks (AKA Kaminoan) has a new book coming out in April 2011 called Minifigure Customization: Populate Your World! Jared has authored the Minifig Customization 101 articles through the years and, of course, has his own operation at Fine Clonier. It looks like you may be able to pre-order the book for 15% off. The regular MSRP is $9.95 and should be in stock on April 27, 2011. Check out the book description here.

Saturday, January 1, 2011

Hot Bath Removal Method for 2011 Magnet Sets

Akunthita put so much work into this, I feel compelled to post...

I'm certain by now that folks have heard that LEGO will be gluing minifigs to bases for all future magnet sets. Heads, accessories, and technically arms can still be removed, but the legs are glued to the base and the torso is glued to the legs (and the ankle bone's connected to the leg bone...).

There have been a variety of methods explored to safely 'liberate' the figs from their bondage. Akunthita has literally explored them all, but has found the most success with a hot water bath technique. I'll leave it at that, and highly recommend you visit Akunthita's site TheBrickBlogger.com.

I'm considering this a tutorial, so you should read our customization tutorial disclaimer before performing any of the recommendations provided within.

Monday, December 27, 2010

A Call for Customization Tutorials

We all have our own vision for what a good LEGO fan site does for the broader community. I for one, think the difference between good sites and great sites are in their ability to help people grow and learn. It is because of this we try to offer as much as we can on customization, photography, and presentation tutorials.

I hope that a few people have had a chance to peruse our page of collected tutorials and find an article or two that has been helpful.

We are always looking for new tutorials to add to this collection. If you know of a tutorial you've found to be helpful, please let us know. If you are looking for a way to post your own tutorial, we may even be able to help with that. Here's hoping we can help folks reach their full potential when it comes to their endeavors with the fig.

As always, please read our tutorials disclaimer before attempting any of the suggestions or techniques described on or link to by this site.

Saturday, December 4, 2010

Search and Reapply: FigureRealm Tutorials

Jackpot! My journeys into the land of action figure customization have yielded yet another trove of tutorials. This lastest find is from FigureRealm.com. Lots of fun stuff to try and reapply on your minifigs - painting tips, modification, and sculpting procedures.

Obviously, there's a fair amount of tutorials that wouldn't apply, but you never know, perhaps these will help expand your customization horizons.

Please read our customization tutorial disclaimer before attempting any of the techniques described.

See all the tutorials at FigureRealm.com.

Friday, December 3, 2010

Search and Reapply: Battle Damage


I'm a big fan of the concept of 'search and reapply' - finding techniques in related fields and using them in your focus area. 

I've been dipping my toe into the online community around custom action figures, and in my search I found this fantastic tutorial on adding battle damage. Very clear, lots of pictures, and nicely detailed. You can see the full review at FireBlade Comics. The end result is quite amazing...

If you see any techniques that can be reapplied to minifig customs, drop me a line and let me know!

Tuesday, November 9, 2010

New Tutorials via Classic Castle


I've been bitten by the high-adventure/fantasy bug recently (think Lord of the Rings or Dungeons & Dragons) and I've been searching far and wide for references, tutorials, and inspiration. It dawned on me after seeing a post at Eurobricks that ClassicCastle.com might be a good source for such information...and it is!

Although some of the tutorials have already been featured in our customization section, there are some great new items in there too like this custom armor tutorial from Lamanda2.

There are even some good construction tips and tricks to help design sets or brick-built beasts for your adventurers to battle.

I'll be adding these to the 'tutorials' section over the next few days, but if you want to get the jump on me you can head on over to Classic Castle right now.

Friday, October 29, 2010

Tutorial: Shobrick's Custom Holster Designs


The tutorial itself is a few months old, but if you would like to see how Shobrick creates his custom holsters you can check out his pictographic tutorial on Flickr. Never has so much been done with just a little electrical tape (wait a minute, I'm channeling Alex Eylar).

The example above was done to great effect by Da-Puma. Thanks to both Shobrick and Da-Puma for sharing.

Thursday, September 16, 2010

Naruto Shippuden Custom Project Collected

This post collects the articles recording my progress in creating a custom minifigure based on the title character from Naruto Shippuden

This is an ongoing project with more articles/tutorials to be added over time, so check back periodically.

This will live in the sidebar along side the other minifig customization resources.

Wednesday, September 1, 2010

Naruto Shippuden Custom: Minifig Head Selection

Naruto Eyes
Although I'll be focused on the Shippuden variation of Naruto, there are many different looks the character takes on in the manga and anime series. One recurring theme in the story focuses on the eyes and the power signified by them. Naruto himself has times when his eyes change based on which state he's in - nine-tails stage, sage mode, or just plain Naruto. Because of this I may want to consider a style of minifig eye that can be used to express the different states. The Exo-Force eyes come immediately to mind, but may not be the only solution.

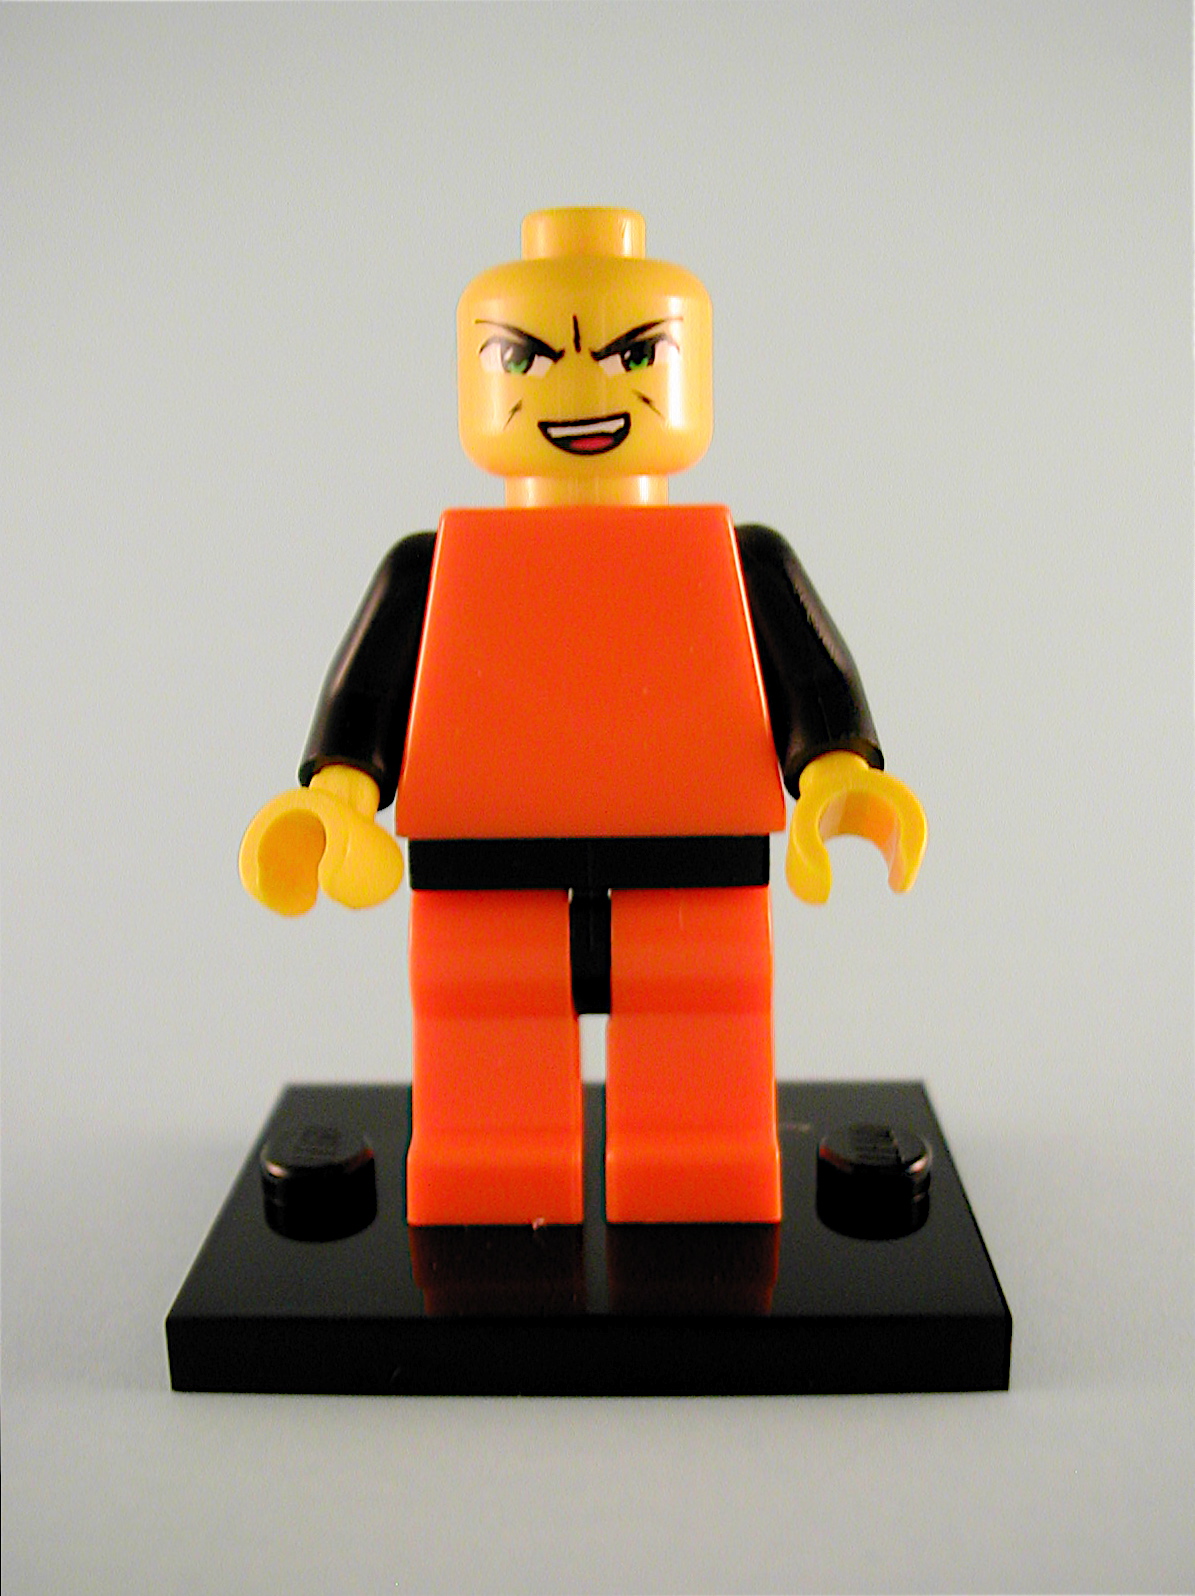
Another design choice to be made is whether the figure will be best expressed as a 'fleshie' or in the classic yellow hue. I've heard many prefer the classic yellow, not only for its nostalgic tie to the LEGO brand, but also because the yellow heads have a broader range of emotion in the facial expressions. Although I would prefer to have a wider emotional range, this may be a challenge to effectively pair blond hair with the yellow skin tone (although the Collectible Minifigure series shows it can be done).

One goal I have as part of this entire process is to explore multiple avenues to see what types of effects work 'best' for a given design. Right here we have several considerations just for the head alone:
  • Fleshie or Classic Yellow
  • Hair Type
  • Bandanna
  • Facial Expressions
If we choose a pre-existing flesh head to modify, then our emotional range is reduced; however, we could decal over a flesh head using any expression we want. If we go with Exo-Force heads, we have the larger eyes, but still a limited emotional range (again we could always decal a unique design with Exo-Force style eyes as an alternative).

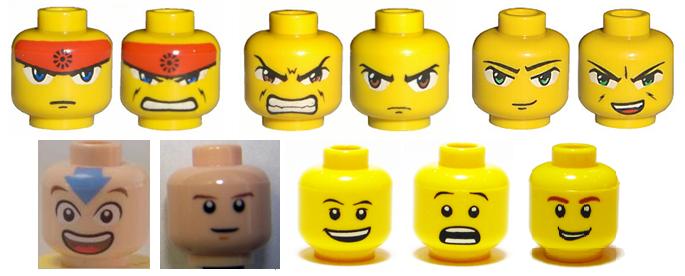
I've compiled a series of minifigure heads that I feel best express the character of Naruto. These pictures are taken from the BrickLink Catalog.
You can easily peruse the catalog by going here and choosing 'parts' for the item type field and 'minifig, head' for the category field. I find that setting the view to 'thumbnail gallery' helps when browsing.

I continue to be drawn to the Exo-Force heads, so that's the direction I'll head for now.

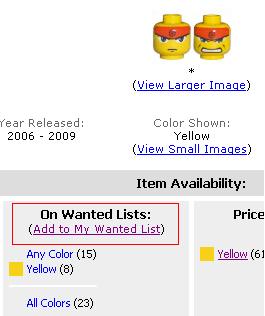
Now that I have a head type in mind, I'll want to create a 'wanted list' in BrickLink to help me identify a store that might have a wide variety of Exo-Force heads in the quantities I'll need. To do this I'll follow the same steps in the catalog as before, but this time I'll only look at the parts released in 2006 (year Exo-Force was released). Clicking on part 3626bpb254 (Ryo), I now have the option to add this piece to my wanted list.

Now, to make life easier you are going to want to create a project specific wanted list and not just add these parts to a generic set. This is accomplished by clicking on the radio button that says 'New Wanted List'. Give the list a name and proceed.

You can then add other project specific parts to this wanted list. In my case I'll add a selection of other Exo-Force heads. Once you've added the items of interest to this project specific wanted list, go back to the 'My Wanted List' tab and change the drop down box from '-All My Wanted Lists-' to 'My [Name] Wanted List' and clicking 'Go!'. This will take you to a listing of all items in your list for this project. Clicking a product type category will show you all of the stores that carry said products, their quantities, and prices. You'll have to compare across this list, but given that the number of stores here is limited, it shouldn't be too difficult.

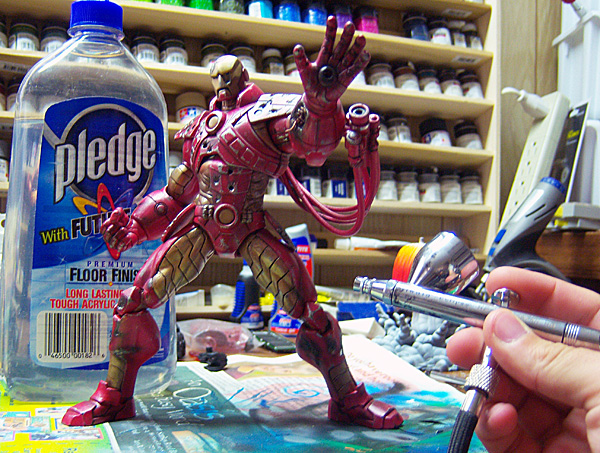
I'm going to hold off on this for now, as I'll likely have other minifig parts to buy before I'm done. In the meantime, I do have an Exo-Force head in my personal collection that I can play with in the interim. Here you can see although I only have a partial torso and leg assembly, the head fits the concept quite nicely. Before I put some money against these items; however, I'll need to further explore other design elements. Namely, the hair and bandanna.

Tuesday, August 31, 2010

Tutorial: Removing Minifigure Arms and Legs

As part of my Naruto Shippuden custom project, I'll be needing to interchange some of the arms and legs to achieve the look outlined in my concept. This video tutorial comes courtesy of James over at LAMLradio/tv. James shows the 'proper' way to do this to avoid inadvertently cracking your torsos during the process. Be forewarned, just as heavy play and movement of the arms in the original torso can lead to loosening of the connection, so too can frequent interchanging.

 
As for the legs, many of the comments I found online were along the lines of, "Don't do it"...which made me want to do it even more! The issue? Many felt removal and reattachment of the legs was more difficult and carried a higher risk of damage due to the smaller, more delicate pins.

Not easily deterred, I went to Morgan19 and asked if he had any tips...and he did! In the artist's own words:

"Trying to describe the process amuses me because it's hard to put into words, but here's how I'd roughly go about doing it...

1) Make sure both leg/hip assemblies you're swapping around are attached to torsos– this gives you a greater surface area to hold onto.

2) Push the right leg up so it's angled forwards, like the minifig is kicking. That'll get the leg out of your way and give you a better angle to amputate the left leg.

3) Hold the torso with your right hand. With your left hand's thumb and index finger placed on the left leg's front and back sides (the thumb sort of rests in the front indentation between the foot and round part), pull it sideways away from the hips.

4) Straighten the right leg back down, and pull it off the hips– should be easy since there's no left leg in the way.

Then it's just a matter or repeating it with the leg/hip part you're putting the new legs onto, and pushing the legs back on. The trick is to get the first leg out of the way so you have room to grip the other one and pull it off sideways, with minimal wear to the hip peg."


I actually tested both techniques with success last night, so I can confirm they work (in my case) with no damage to the figure. Does that mean you'll have no damage every single time? No. But hopefully these approaches reduce the probability of damage, while increasing chances for success.

(Via LAMLtv and big thanks to Morgan)

Wednesday, August 25, 2010

The Journey Begins: Naruto Shippuden Custom

I'm sure that many readers who are into minifig customization have often said, "Sure. Cygnet talks a mean game, but what has he really done?" Those who can customize do, those who cannot blog about it, right? Well. I like to change that starting...now.

This begins a periodic series where I'll be detailing my journey in creating a custom minifigure using many of the tutorials and resources available on the internet. My hope is not to dictate that it's 'my way or the highway', but instead to show how anyone can do this (and trust me, if I can do it you can too).

I've chosen to create a custom Naruto Shippuden minifigure. Naruto is a series of manga and anime featuring a world where Ninja nations vie for power. The main character, Naruto Uzumaki, is a bit of an outcast with dreams of becoming leader of his village. Oh, and he has a nine tailed fox demon living in his belly button. If you would like to learn more about the character I would recommend reading the manga series from Shonen Jump or look here.

Being familiar with the character myself, the next step is to identify and isolate the design features that will make the character instantly recognizable, but still retain a LEGO minifigure look. A good resource on prepping for conceptual design is authored by Readbean from his Minifig Customization Network days and can be found here.

Looking at the reference photo you'll note that some of the main design features include the orange jump suit with black highlights, the blond anime style hair, and black bandanna with Konoha insignia. If we were to capture these elements alone, I could see 9 out of 10 people familiar with the character identifying it as Naruto. Secondary design elements include the leg holster, the shoulder badge, and facial markings. These secondary elements add some additional flavor and detail to the overall design. Much beyond this and I would suspect the figure will look cluttered.

These are just a few elements to consider at the concept stage. Now to get on with working out some details of the design. I am personally more of a pencil and paper person, preferring to sketch my designs before hitting the figs. I was able to find this template of a full, head-on minifigure. Using this blank template, I sketched out an initial design. I cannot emphasize how helpful it was to do this. I originally started from memory and got many of the design elements wrong. Combining this step with several reference photos will give you a much stronger vision for what you want to try and create. I've included a picture of my sketch here.

With final concept in hand, I'm ready to move on the the next stage and delve into the depths of BrickLink and find some raw materials for the project.

Wednesday, August 18, 2010

Minifig Customization Network Tutorials: Collected

Let me start this out by saying, "this is NOT my work". These are only links to the individual posts where the tutorials reside. I'm only collecting these here for ease of navigation.

The tutorials appear to be what's left of The Minifig Customization Network, a website jointly developed by Redbean and Kaminoan. If anyone has more on this story, I would love to hear it...

If you google the site, you're likely to end up here, but many of the links are gone. The last updates happening back in  September 2009. I don't exactly know what happened (A swarm of locusts perhaps?), but there's still gold to mine from the site's previous incarnation.

Each article contains a byline by the original author. Much thanks to those authors and the work that has come before.

Conceptualization
Decals
Modification
Molding
Painting
Cloth Accessories

      Saturday, July 31, 2010

      Impromptu Decal Tutorial - Tac and JasBrick

      Tac Decal TestsWe'll if you have figured it out, the decal experiments I was referring to are these pics from Tac. Utilizing a variety of helmets and armor from Space Police III, Power Miners, and BrickForge. TLG is obviously taking notice with the World Racers helmets. Helmets from Space Police and Power Miners just beg for this type of treatment. But wait, there's more!

      If you read through the comment thread JasBrick steps up to the plate and give an impromptu tutorial on decal application. For your consideration: